

MumbleWay talks to any Mumble server. The server software
is called Mumble Server (historically Murmur, and the binary is still
often mumble-server or murmurd).
You need one of these:
- A machine at home — a spare PC, a NAS or a Raspberry Pi is plenty. A Mumble server for a riding group uses almost no CPU and a few MB of RAM.
- A cheap VPS — the smallest tier anywhere is more than enough, and it saves you opening a port at home.
- A hosted Mumble server — several companies rent them by the month.
Port 64738, TCP and UDP. Mumble uses TCP for control and UDP for voice. If UDP is blocked it falls back to sending voice over TCP, which works and adds latency. Forward both.
Linux
The usual home for a Mumble server, and the least trouble.
Debian, Ubuntu, Raspberry Pi OS
sudo apt update
sudo apt install mumble-server

# Sets the SuperUser password and enables the service at boot.
sudo dpkg-reconfigure mumble-server
Configuration lives in /etc/mumble-server.ini (older packages:
/etc/murmur.ini). After editing:
sudo systemctl restart mumble-server
sudo systemctl status mumble-server
Fedora, RHEL
sudo dnf install mumble-server
sudo systemctl enable --now mumble-server
sudo mumble-server -supw YOUR_SUPERUSER_PASSWORD
Docker, anywhere
docker run -d --name mumble \
  -p 64738:64738 -p 64738:64738/udp \
  -v mumble-data:/data \
  --restart unless-stopped \
  mumblevoip/mumble-server:latest
Set the SuperUser password on first run:
docker exec -it mumble mumble-server -supw YOUR_SUPERUSER_PASSWORD
Windows
- Download the server package from mumble.info/downloads — it is a separate download from the client.
- Install it. The installer offers to run the server as a Windows service; accept if you want it up after a reboot.
- Configure
murmur.ini(ormumble-server.ini) beside the executable, or in%ProgramFiles%\Mumble\. - Set the SuperUser password from an Administrator prompt:
cd "C:\Program Files\Mumble"
.\mumble-server.exe -supw YOUR_SUPERUSER_PASSWORD
- Allow it through the firewall — both protocols:
New-NetFirewallRule -DisplayName "Mumble TCP" -Direction Inbound `
  -Protocol TCP -LocalPort 64738 -Action Allow
New-NetFirewallRule -DisplayName "Mumble UDP" -Direction Inbound `
  -Protocol UDP -LocalPort 64738 -Action Allow
The executable has been named murmur.exe in older releases and
mumble-server.exe in newer ones. Use whichever is in the folder.
macOS
Homebrew is the least painful route:
brew install mumble-server
brew services start mumble-server
Set the SuperUser password:
mumble-server -supw YOUR_SUPERUSER_PASSWORD
The configuration file is under Homebrew’s prefix — /opt/homebrew/etc/ on
Apple Silicon, /usr/local/etc/ on Intel. brew info mumble-server prints the
exact paths for your install.
A Mac at home makes a fine server for a group, but it has to stay awake: System Settings → Energy, and disable sleep.
Settings worth changing
In mumble-server.ini / murmur.ini:
| Setting | Suggested | Why |
|---|---|---|
welcometext |
Your group’s name | Shown on connect. |
serverpassword |
Something, if the server is public-facing | The simplest access control there is. |
port |
64738 |
The registered default. Change it only if you must. |
users |
20 |
Cap it. There is no reason to leave it open-ended. |
bandwidth |
72000 |
Bits per second per user, generous for Opus. Lower it if your uplink is thin. |
registerName |
Your group’s name | The name of the root channel. |
registerUrl, registerHostname |
leave empty | Setting these lists your server in the public directory. Leave them blank to stay unlisted. |
allowping |
false |
Stops strangers probing it for user counts. |
sslCert, sslKey |
Paths to a real certificate | Optional. Without it, clients see a self-signed certificate and pin it on first connect. |
Connect from MumbleWay
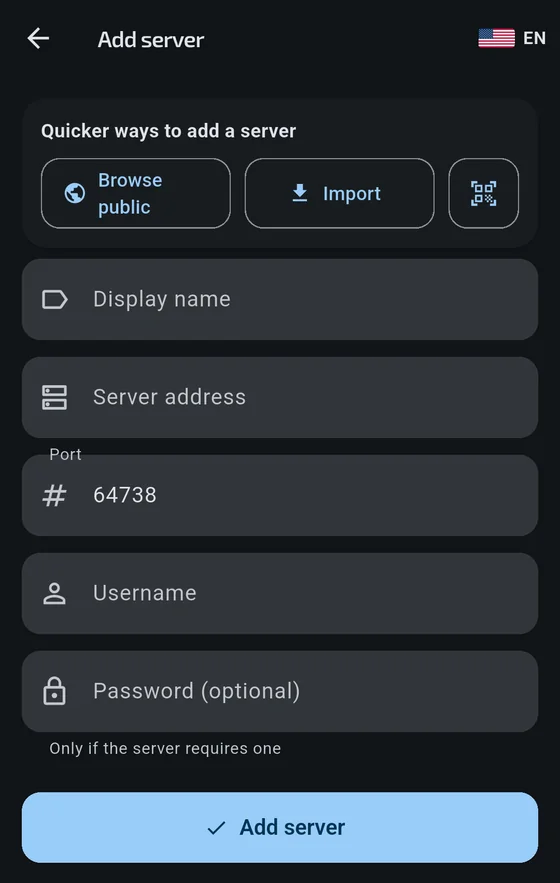
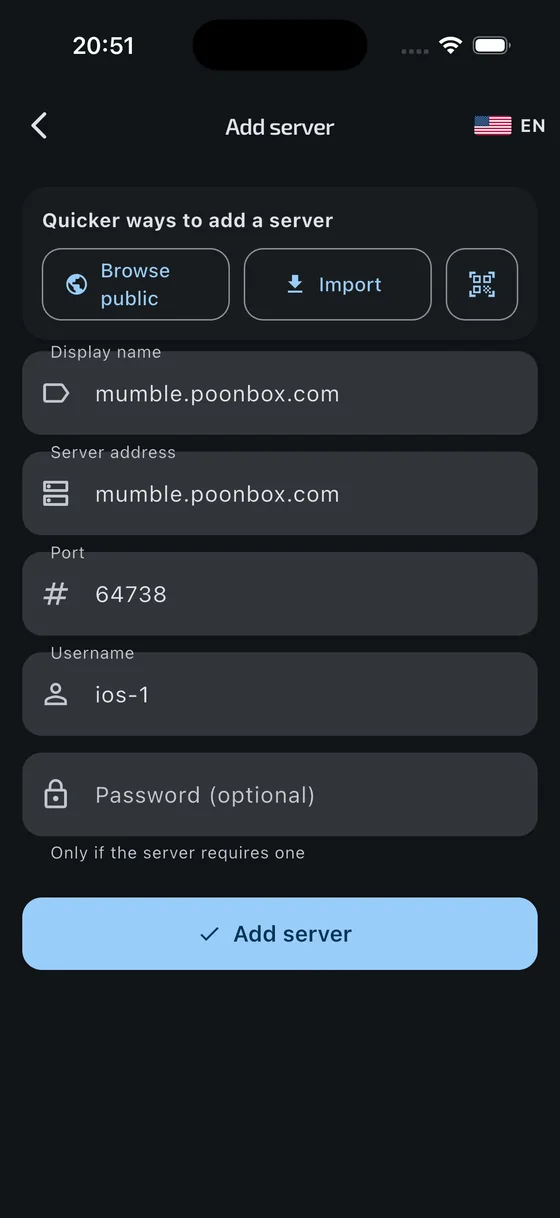
- Add another server in the app.
- Address — your public IP, your dynamic-DNS name, or the VPS hostname.
- Port — 64738 unless you changed it.
- Username — anything; it is how you appear in the channel.
- Password — the
serverpasswordif you set one.
Then share it with the group by opening the server’s QR code in the app and letting them scan it, which beats reading an IP address through a helmet.
Registering users. Connect once with the Mumble desktop
client as SuperUser using the password you set, and register the
riders. Mumble identifies people by their client certificate rather than a
password, so a registered rider is recognised automatically from then on —
which is why the app's Identity setting is worth keeping.
mumble:// link, which fills the form
in for you.Going further
This page covers only enough to get a group talking. Mumble has considerably more — ACLs and groups, channel permissions, Ice/gRPC administration, bots, positional audio, LDAP authentication:
Mumble documentation →
Server configuration, administration and the protocol
itself, from the Mumble project.
mumble.info →
Downloads, community and news.